

Reloading is a way of life for many shooters. I know it has been for me.
My Reloading Journey
I started my reloading (or, as some refer to it, handloading) journey in the spring of 1978. I was a band director at a small school in a rural southern Indiana town with access to extensive open land to shoot on (and ponds to fish in, but that’s a different story). I wanted to shoot my first centerfire gun, a 7 ½” Ruger Blackhawk in .45 Colt, more for a given amount of money. So, I bought an inexpensive Lee kit that allowed you to resize the case by striking it with a hammer against a die. It was interesting, to say the least, but not very productive.
As soon as I could, I graduated to an RCBS Jr. press, a Uniflow powder measure, and a 505 mechanical scale with related accessories. This is where I should have started, but my teacher’s salary at the time dictated otherwise. That press helped me assemble thousands of rounds of .45ACP, .357 Magnum, .44 Magnum, and other calibers. I was a happy camper who shot my home-cast bullets made from scrounged wheel weights.
In later years, as I became increasingly involved in gun writing, I added a Lee turret and three progressive presses: a Lee Six-Pack Pro, a Dillon XL-750, and an RCBS Pro Chucker. That does not count another RCBS single-stage press I’m getting in for another review, the Summit. So, with three single-stages, a turret, and three progressive presses, I guess you could say that the hobby “took”. I’ve been rolling my own ammo for almost 50 years, shooting mostly my home-cast bullets. I had been approached by several shooters over the years about how to get into the reloading game, which leads me to the reason for this article.
If you’re not a reloader yet but have considered it, read on…
How To Get Into Reloading
One of the best ways to be a better shooter is to shoot more… duh! And, one of the best ways to shoot more is to become your own ammo factory. That’s agreed, as well. But how do you do that? What do you need to know and buy for that to happen? How does it work? Let’s look at the answers to those questions.
The Process
Reloading is a process that relies on precision equipment and tried-and-true components, as well as “recipes” (load data). We’ll touch on that a bit later.
Certain things must happen if you decide to make your own cartridges. By cartridge, I mean center-fire. You cannot reload rimfire cartridges.
Center-fire cartridges consist of a cartridge case, a primer, powder, and a bullet. You can reload shotshells, too, but we won’t discuss those now.
Cases are typically made of brass and have one central priming hole in the primer pocket. This is indicative of the Boxer priming system. The other system, Berdan priming, is typically not addressed by reloaders, and we won’t discuss it here. Cases can be bottlenecked (many rifle calibers use this type of case) or straight-walled (pistol and straight-walled rifle calibers).
Here are a couple of key terms you should be familiar with that are relevant to the case. One is the head – the section of the case just in front of the rim. Another is the mouth – the open end of the case. You will want to examine fired cases before reloading to ensure they are not split or that the case mouth is not split. Those are common reasons to toss the case. The head is subject to expansion with heavy loads, but that’s not a part of this “Reloading 101 class.” Experienced reloaders who shoot high-pressure loads will measure the head with calipers or a micrometer. For beginners using published data, that is probably overkill. You need to be aware that such a thing exists, at the least, and avoid overpressure loads.
Primers come in two sizes… large and small. There are large pistol and rifle primers, as well as small primers for pistols and rifles. Another variation has to do with the priming compound’s strength. You will find both regular primers and magnum primers, which produce a hotter flame, which is necessary for some powders. For most purposes, regular primers are sufficient. Load data will tell you which to buy.
Powder is an article unto itself. You will need to research your starting caliber to find suitable powders, and it’s recommended that you purchase a pound of a couple of different types to try. (You could go broke buying all the available powders for common cartridges, so we’ll limit it to two types). Again, check a reliable loading manual or a powder manufacturer’s website for correct info. DO NOT rely on Billy Bob’s Reloading Page! Many online data sources provide sketchy information, to say the least. Published sources are the best, from a powder manufacturer. All it takes is one overpressure load to ruin your day – and possibly your gun or hand.
The Bullet that you choose to load can be something that you cast yourself – there is a whole world of bullet casting equipment and instruction out there. Or, let’s say you bought some suitable bullets of the correct diameter and weight after researching the topic. You are most likely going to load practice ammo to start with, so FMJ (or cast/powder-coated bullets, if a pistol caliber) will work without spending more on JHP or JSP bullets.
Reloaded Ammo Uses
We’ve discussed creating ammunition for your personal practice… that is probably the main reason most shooters get into reloading. Any decent bullet will work for this. Once, when I bought bullets, I also purchased a quantity of factory seconds – that’s a good idea. There was nothing wrong with them ballistically – they just weren’t “pretty” enough to sell the normal way.
Another significant reason people get into reloading is for target shooting or competition. You can make loads that will shoot the nuts off a gnat at 300 yards, or make something that isn’t available commercially. Competitors go through thousands of rounds, so buying in bulk and building your loads makes sense.
What about self-defense? I would not carry handloads for self-defense in my concealed carry gun. In a worst-case scenario, a sharp lawyer could make you regret carrying your home-brew loads if it came down to that. Carry factory ammo.
What about ammo for hunting? I’ve loaded mid-range.44 Magnum ammo for decades that has brought down a truckload of deer, all using my home-cast SWC bullets at a reasonable velocity. Whether you use an open-sighted revolver like I did or a very nice rifle/scope combo in an elephant-stomping caliber, you should be able to work up a load or two that will work. Please, double-check your load data and practice with the loads before heading afield.
In terms of procuring the supplies you need to reload, here’s a thought… Buying components in bulk will ultimately save you money. Talk to your reloading friends and place an order for more than you would use personally. If you order primers or powder, a shipping HazMat fee will apply. If 3-4 folks are splitting it, it’s more manageable. You can take advantage of multi-box discounts.
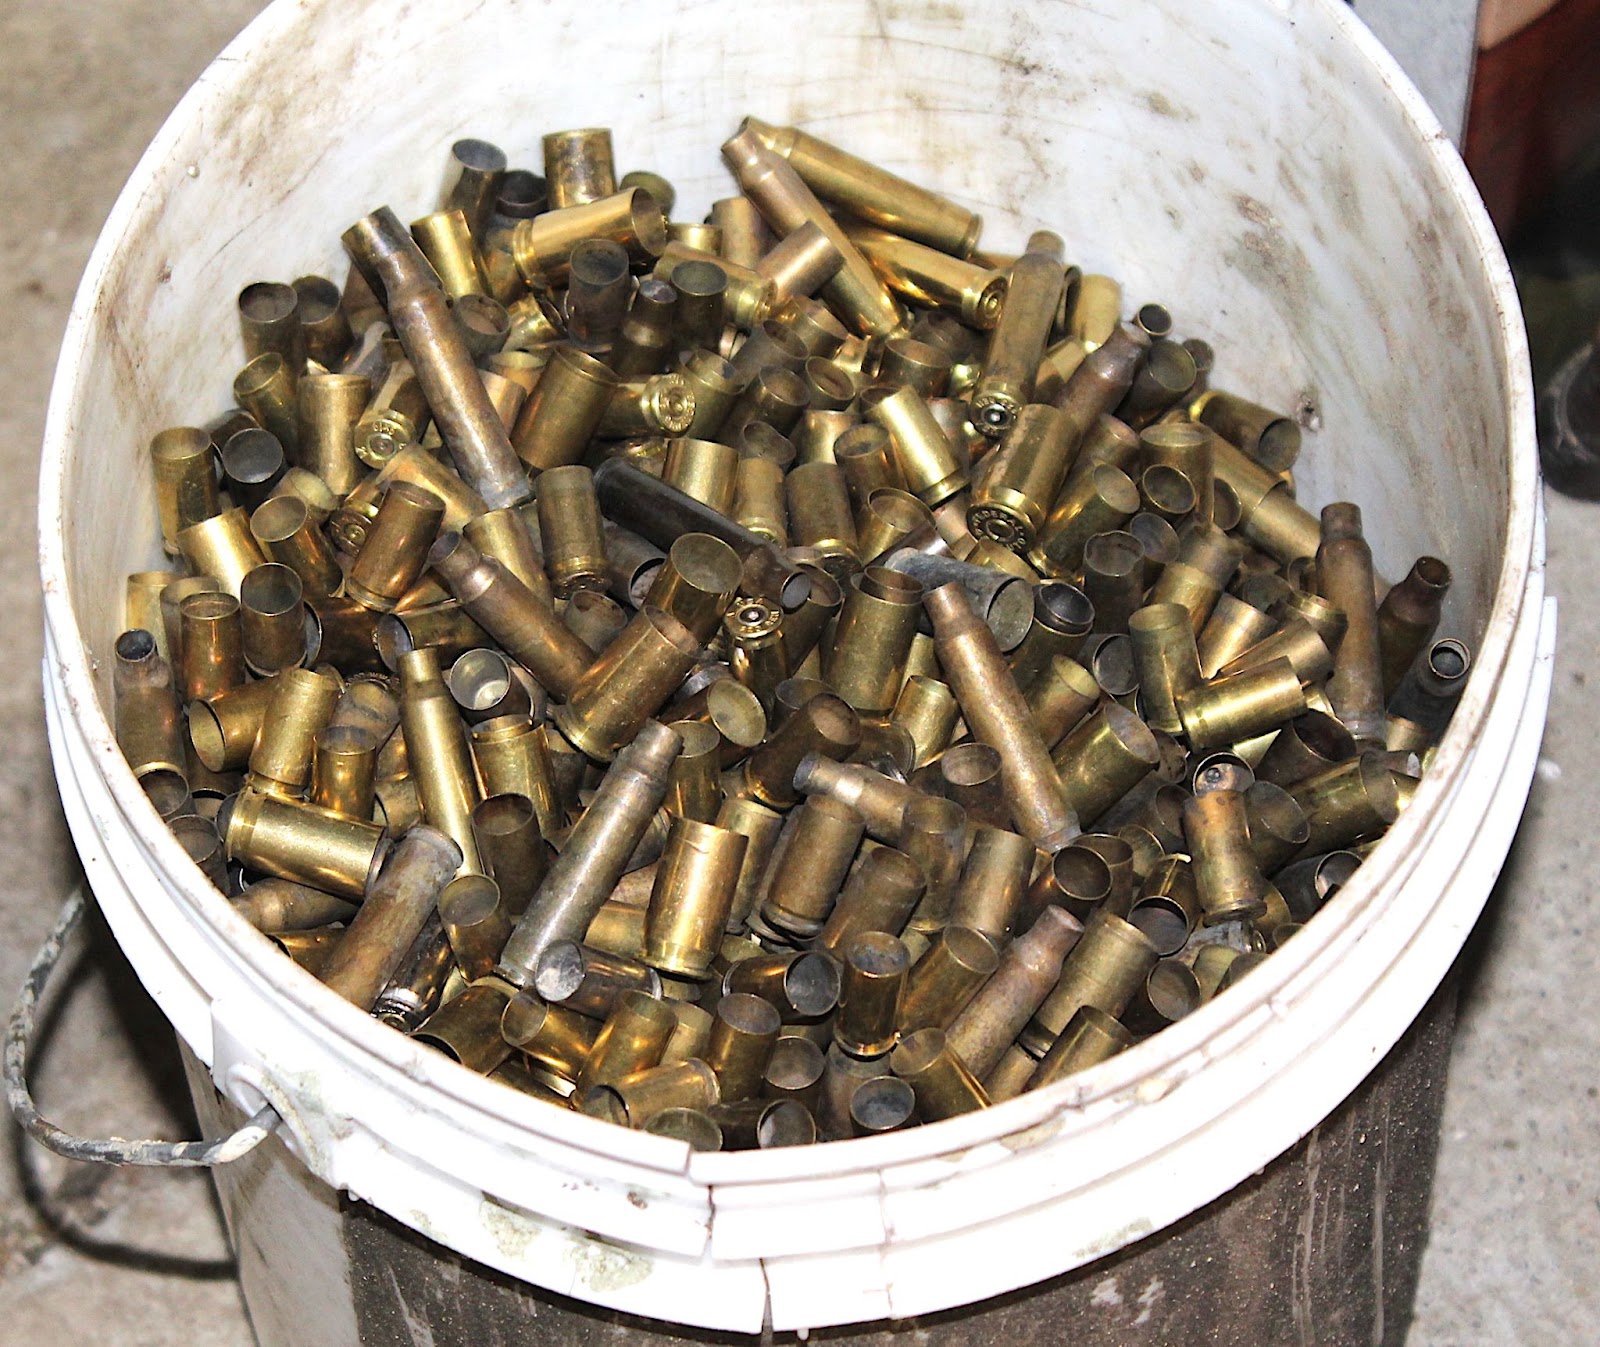
(Of course, this is one way to acquire brass… from the range!)
OK. You’ve assembled the proper components after talking to other reloaders or researching what’s needed. Now what?
You need equipment. But, before you rush out and buy a lot of stuff, let’s look at the reloading process…
Reloading Steps
- First, after inspecting, cleaning, and/or tumbling your cases, you must resize the case and knock out the spent primer (called decapping). Tumbling, ultrasonic, or rotary cleaning is recommended, as it will clean the cases both inside and out, allowing you to inspect them easily for cracks and other defects. You can use solid or liquid methods, depending on the tumbler. RCBS offers several solutions for cleaning and processing cases; for more information, please visit here. (One tip, from years of experience… if you tumble your cases after sizing and de-priming, clean the primer flash hole. There will be a piece of tumbling media stuck in it about 90% of the time. A tiny screwdriver works great for this, or sometimes you can just blow it out. Also, small bottleneck cases like the .223 will need emptying of solid media, so watch out.)
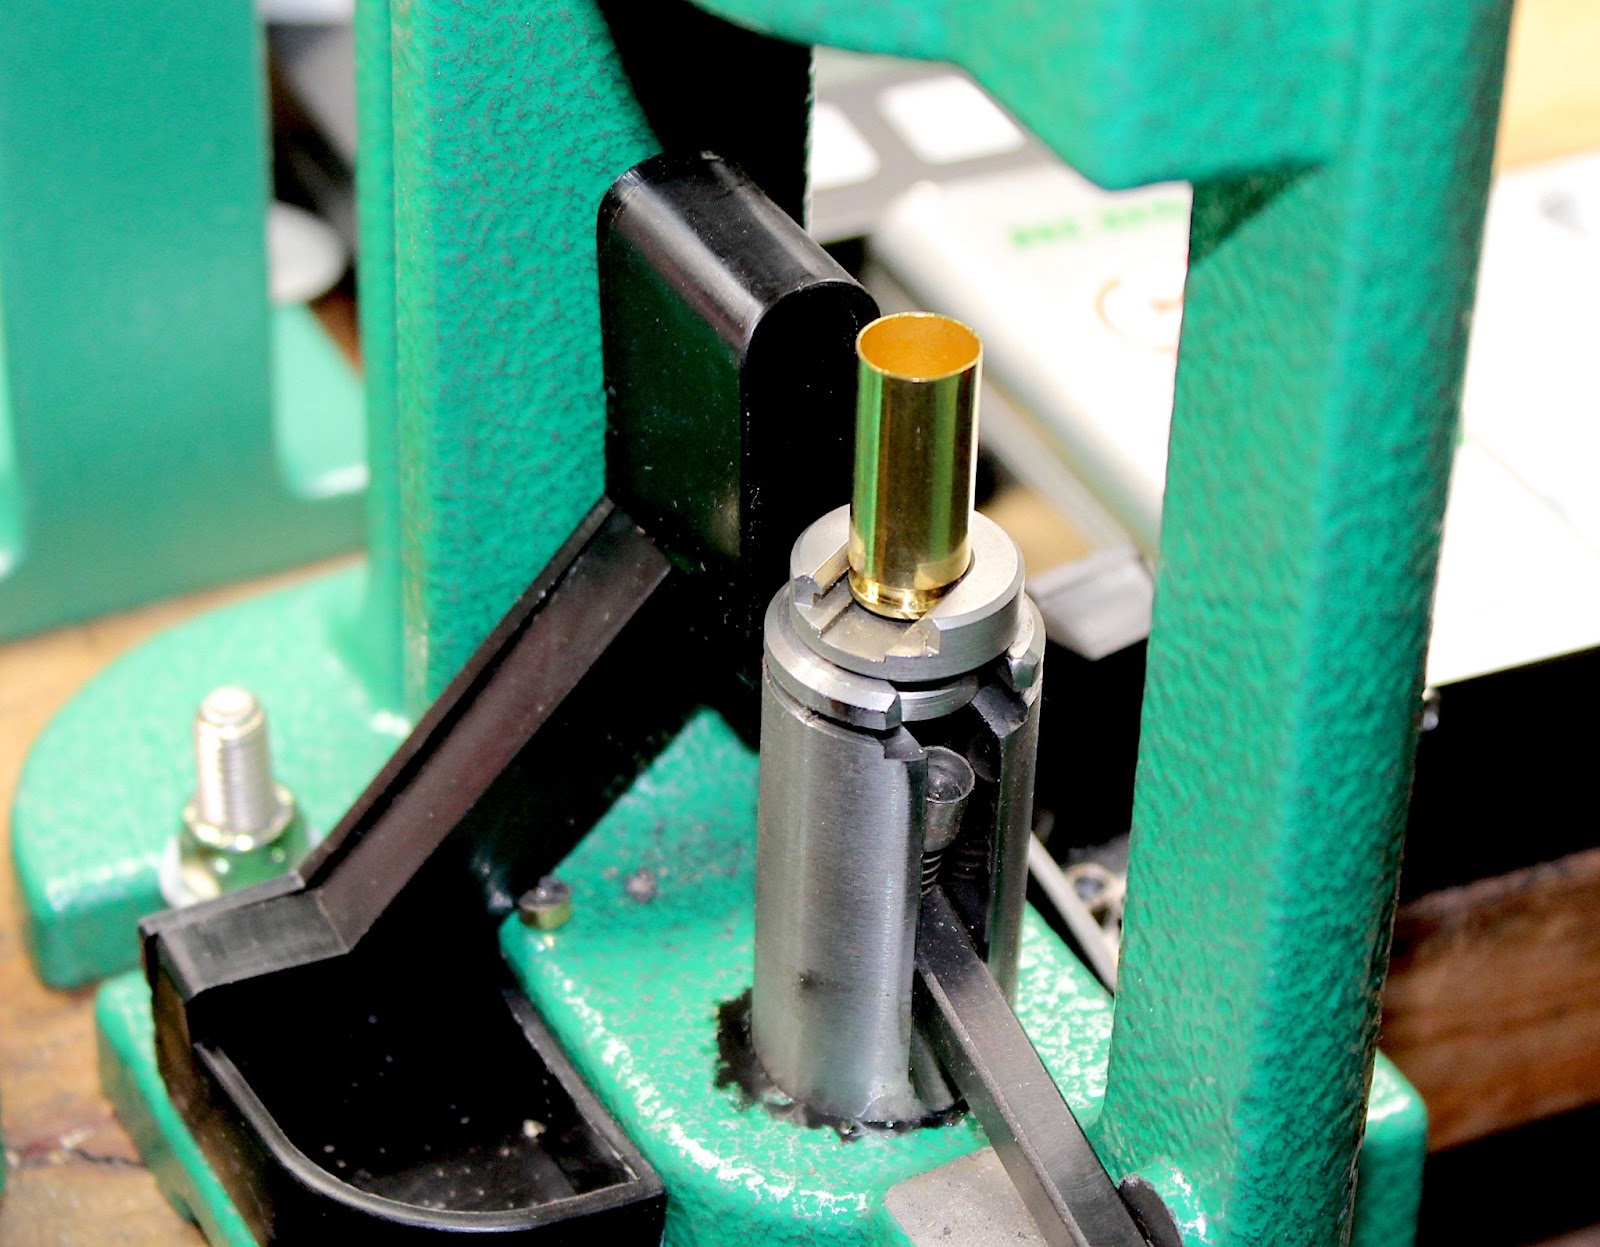
- Typically, after sizing and decapping, a new primer is inserted at this stage on many presses.
(Barely visible in this photo is the replacement primer cup, holding the primer I scrounged up.) I lost the large black pistol priming cup that attaches to the priming arm, which came with the kit. I took the one off my 1978 RCBS Jr. press, and it fit perfectly. Its silver color gives it away. If it ain’t broke, don’t fix it!)
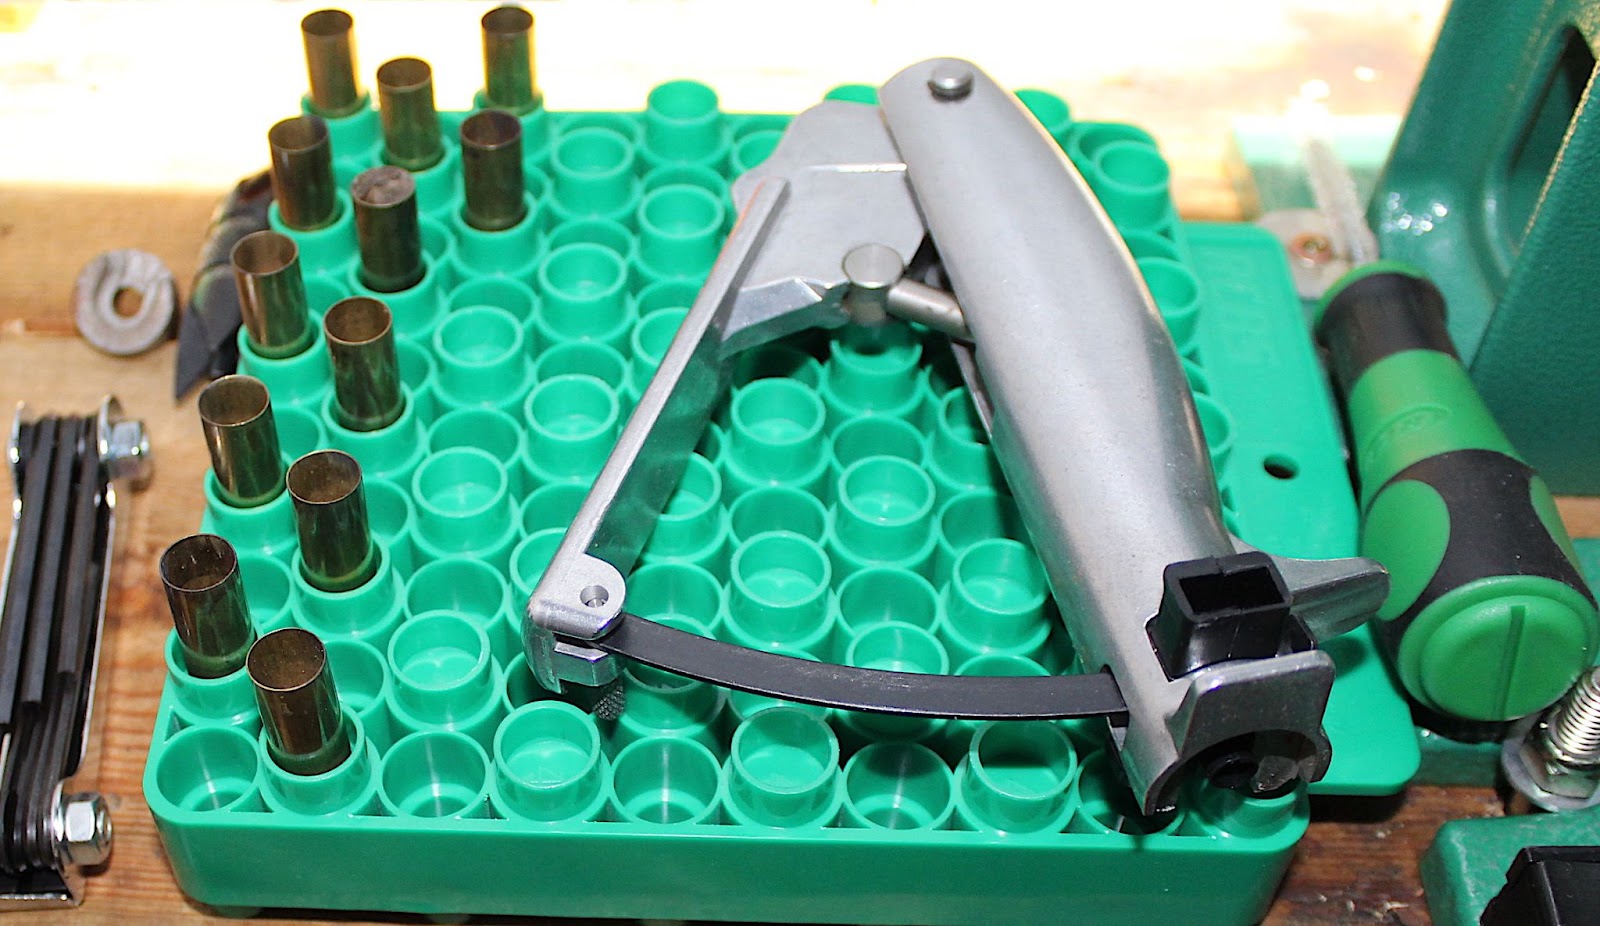
Another option is hand-priming, off the press. Press priming tends to be a little easier for the beginning reloader, as everything is done in sequence, on the press, with no extra equipment needed. But, I will say that off-press priming is fairly easy to accomplish if you are using a single-stage or turret press. Progressive presses have effectively integrated priming into the process, so it’s more involved in priming off-press with that type. This kit comes with a hand primer, so it’s up to you.
One advantage of off-press priming is that, once your cases are clean and decapped, you can sit in front of a TV with a Cool Whip container full of cases and prime them while watching your favorite outdoors show.
Just make sure that, no matter how you prime, you check each case to ensure a) that there is a primer there, and b) the primer is seated at least flush with, if not a couple of thousandths below, the case head (the end of the case). It should never be protruding, even slightly. That’s asking for trouble.
- Next, you need to expand the mouth of the cartridge case if it is a straight-wall case. Bottleneck cases do not require expansion. Additionally, their lubrication requirements differ.
- After that, powder is dropped. This assumes that you have set your powder measure to dispense the correct weight after carefully weighing the charges to properly set the dispenser. Or, you can use a powder trickler or digital scale to dispense powder. The quickest way, though, is the powder measure. It may be the least accurate of the three methods, but for 90% of what you load, it should work fine.
- Once the case is charged, a bullet is placed in the case mouth, seated, and the case mouth crimped to hold the bullet.
That’s the basic process.
Equipment
You will need proper equipment to carry out these steps. This consists of, at a minimum, a:
Reloading Press. The three basic types of presses are single-stage, turret, and progressive. Here are the differences…
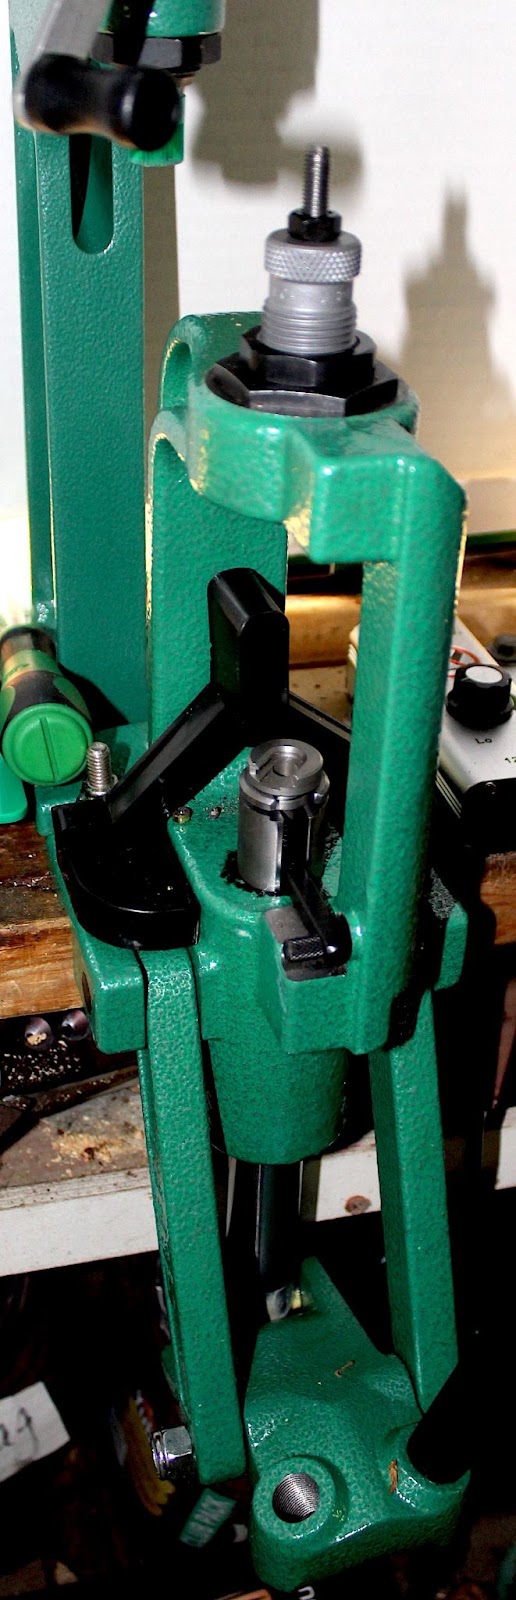
- Single-stage presses do one operation at a time. There is one shell holder. You resize, decap, and re-prime all your cases. Then you change dies, expand the case mouth, and drop powder (bottleneck cases skip the expansion step, remember). The third die (pistol set) allows bullet seating and crimping. With bottleneck cases, this is the second die. The press we are looking at in this article is a single-stage press.
- Turret presses have a tool head with several spaces to screw in all your dies at once. You still have one shell holder, similar to a single-stage press. You perform one operation, then the turret rotates to the next station – either automatically or by hand. After all the processes are finished (as many cycles of the press handle as there are die stations), you have a completed cartridge. I think of turret presses as if they were multi-headed single-stage presses… you still have to perform each process on the case, but you don’t have to screw/unscrew dies in between processes. The dies stay put in the tool head.
- The third type of press is progressive. This is the type of press that, with practice, allows you to produce approximately 500 loaded cartridges per hour. It consists of a tool head similar to that on a turret press (but typically with more die stations). The primary difference lies in the shell holder. Instead of only one, like the single-stage and the turret press have, you will have a plate with as many shell holders as you have die stations in the tool head above it. So, once you start case 1 on its journey, when it reaches die #2, a new case is inserted into the shell holder plate and the process begins again from die #1. Each case moves around the shell holder plate in a cycle and then is kicked out after the final stage into a waiting collection bin.
Once the shell holder plate is fully loaded, a loaded round drops into the collection bin with each handle cycle. That’s where your speed comes from. You just need to keep an eye on priming and powder charging. I’ve had problems with either the press not seating a primer or not dropping the powder charge. There are things you can buy that will check these areas, but that’s beyond the scope of this article. Progressive presses tend to be more than a beginning reloader needs – they are fairly complex to set up and to run.
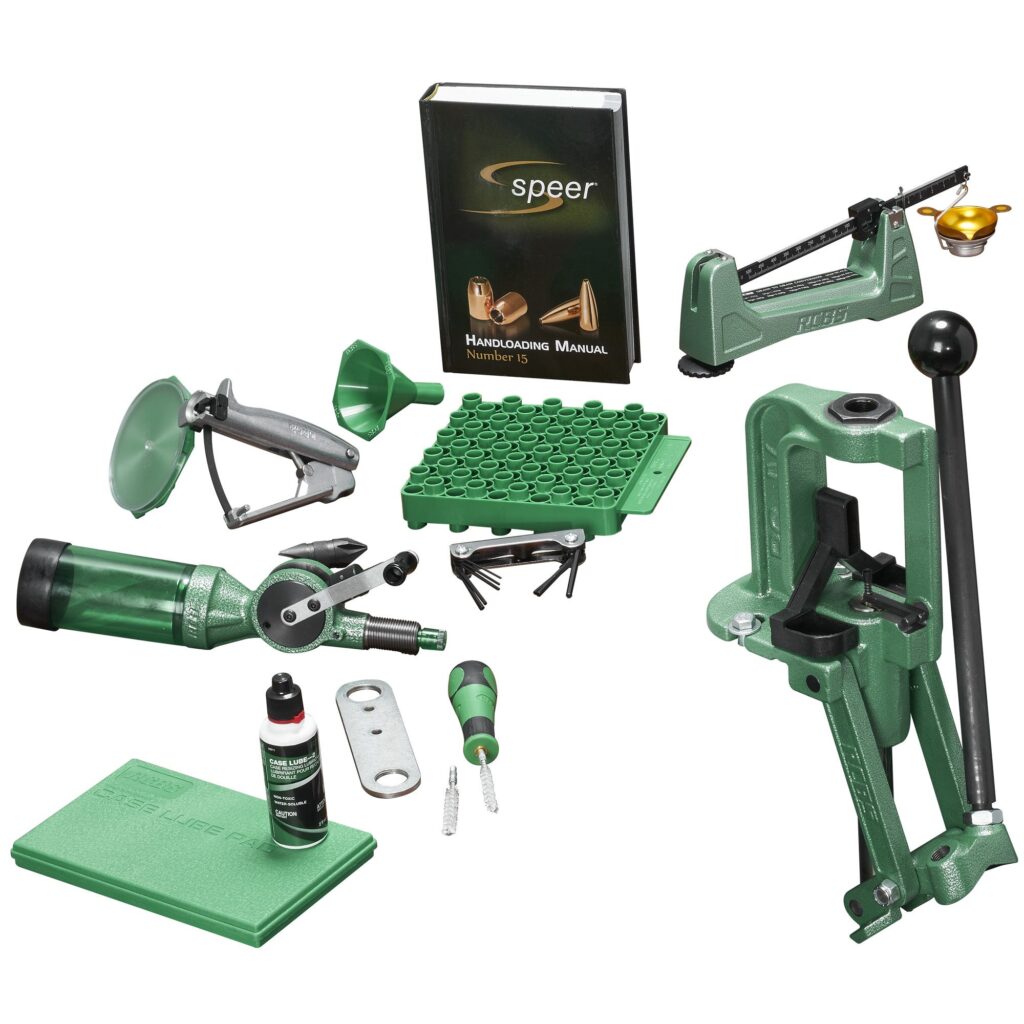
The Rock Chucker Supreme Master kit features a single-stage press, and I recommend it to beginning reloaders.
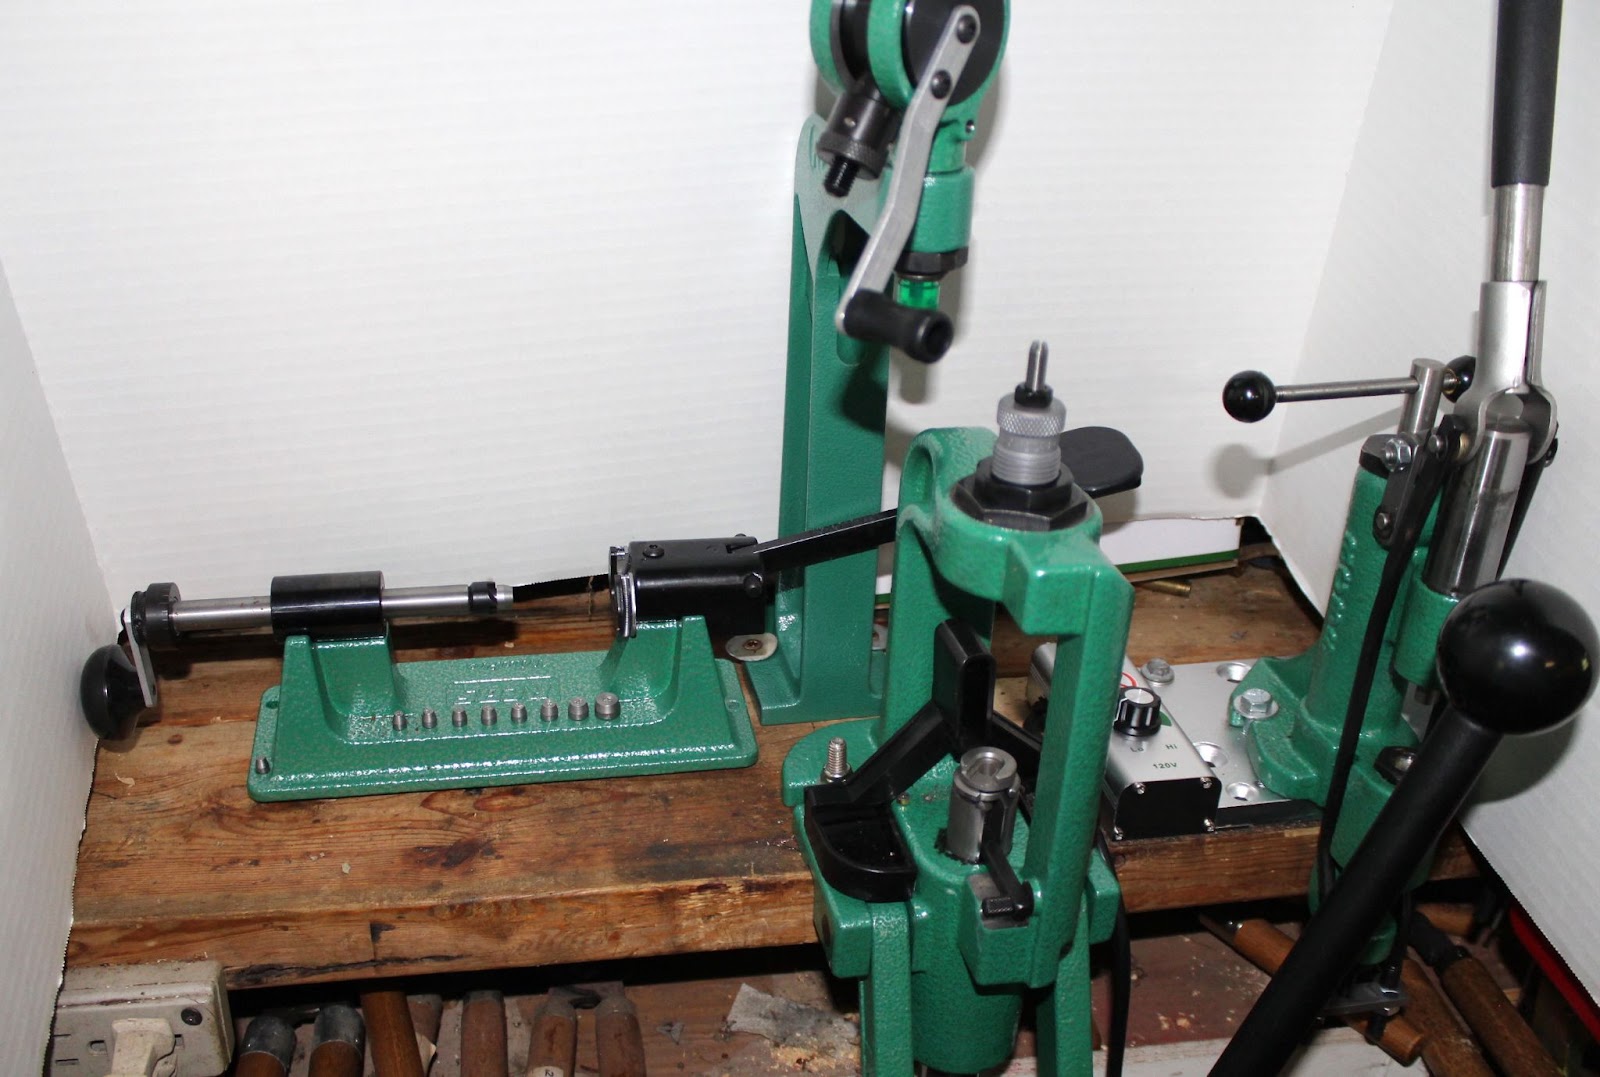
L-R: RCBS manual case trimmer, press with Uni-Flow III powder measure behind it, Lub-A-Matic bullet lubricator/sizer
I’ve helped newbies get into reloading for years, and in my opinion, beginners should not start with a turret or a progressive press, as I mentioned earlier. There is a process to learn, and that is usually best accomplished by keeping things simple with a single-stage press. There is nothing wrong with adding another press later, once you’ve gotten the drill down, but do yourself a favor and start with a single-stage press.
However, there are cheaper single-stage press kits available. Why spend this much?
I can answer that in two words: quality and longevity. I have used cheaper equipment to reload and have had problems on occasion. I’m not bashing any brand, understand. I’m saying that with reloading equipment, you get what you pay for. Here’s an example… many cheaper presses do not use compound linkage, which increases the force needed to resize some cases (if the press can handle them at all). The Rock Chucker Supreme utilizes compound linkage, making it easy to size even large rifle cases. It’s also made from cast iron, while some cheaper presses are not. I own and have used less expensive equipment for years. For what it can do, it works fine. However, heavy-duty cast iron and compound linkage will ultimately prevail.
Heck, even RCBS sells cheaper kits, but I recommend this one. Why? I answer that with another question… how many single-stage presses do you plan to buy over the course of your reloading years? There will always be a use for a single-stage press on your bench. If you buy this one, you won’t need to “upgrade” to anything else. I use my example here, with my ancient RCBS Jr. press. It works, plain and simple, exactly 47 years after I bought it as of this year. I still find uses for it, even with more “modern” presses around. Progressives are great, but there are some uses that only a strong, single-stage press can tackle.
What’s Included?
This press kit has almost everything you need to start producing content. According to its web page, here is what is included:
Item: Individual Price ($):
- Rock Chucker Supreme Press 235
- .17-.60 Debur Tool 28
- Accessory Handle – 2 with two case neck brushes 13
- M500 Mechanical Scale 100
- Uniflow-III Powder Measure 110
- Hand Priming Tool 60
- Universal Case Loading Block 12
- Hex Key Set 10
- Case Lube Kit 26
- Powder Funnel 7
- Speer Reloading Manual 45
- Press Kit Price (RCBS website): $499.99
For comparison, the numbers above represent the costs of each individual item on the RCBS website, rounded to the nearest dollar. You can see the savings you get by buying the kit… You’re saving $146 off the individual prices.
For a price of less than $500, you get some pretty sophisticated equipment. (I’ve seen the kit $20 cheaper from some third-party sources, and $20 more expensive from others. Go figure…).
Accessories include the hex key set, deburring tool, hand primer, and accessory brush.
Not Included, But You’ll Need It
You will need to purchase a set of dies (pistol, approximately $50-$80; rifle, approximately $45-$80) and a shellholder (approximately $8-$10) for the caliber you are reloading.
Another thing not included with the kit that would be helpful is the $22 primer pocket brush kit. It comes in small and large sizes, with a nice handle, and allows you to keep primer pockets clean. That is important. (If $22 is too much, they sell a $9 brush without screw-in brushes… It’s one piece). The brushes you see in the lead photo are for lubricating the inside of rifle case mouths, allowing the expander ball to glide easily.
(All prices are from the RCBS website. There are third-party options for several of the items shown here that might be a bit cheaper, but for the sake of consistency, I’ve shown what RCBS offers).
The press. The Lub-A-Matic on the right is not part of the set.
Let’s look at the kit now. I recommend visiting the web page for more comprehensive explanations about the equipment.
The Kit
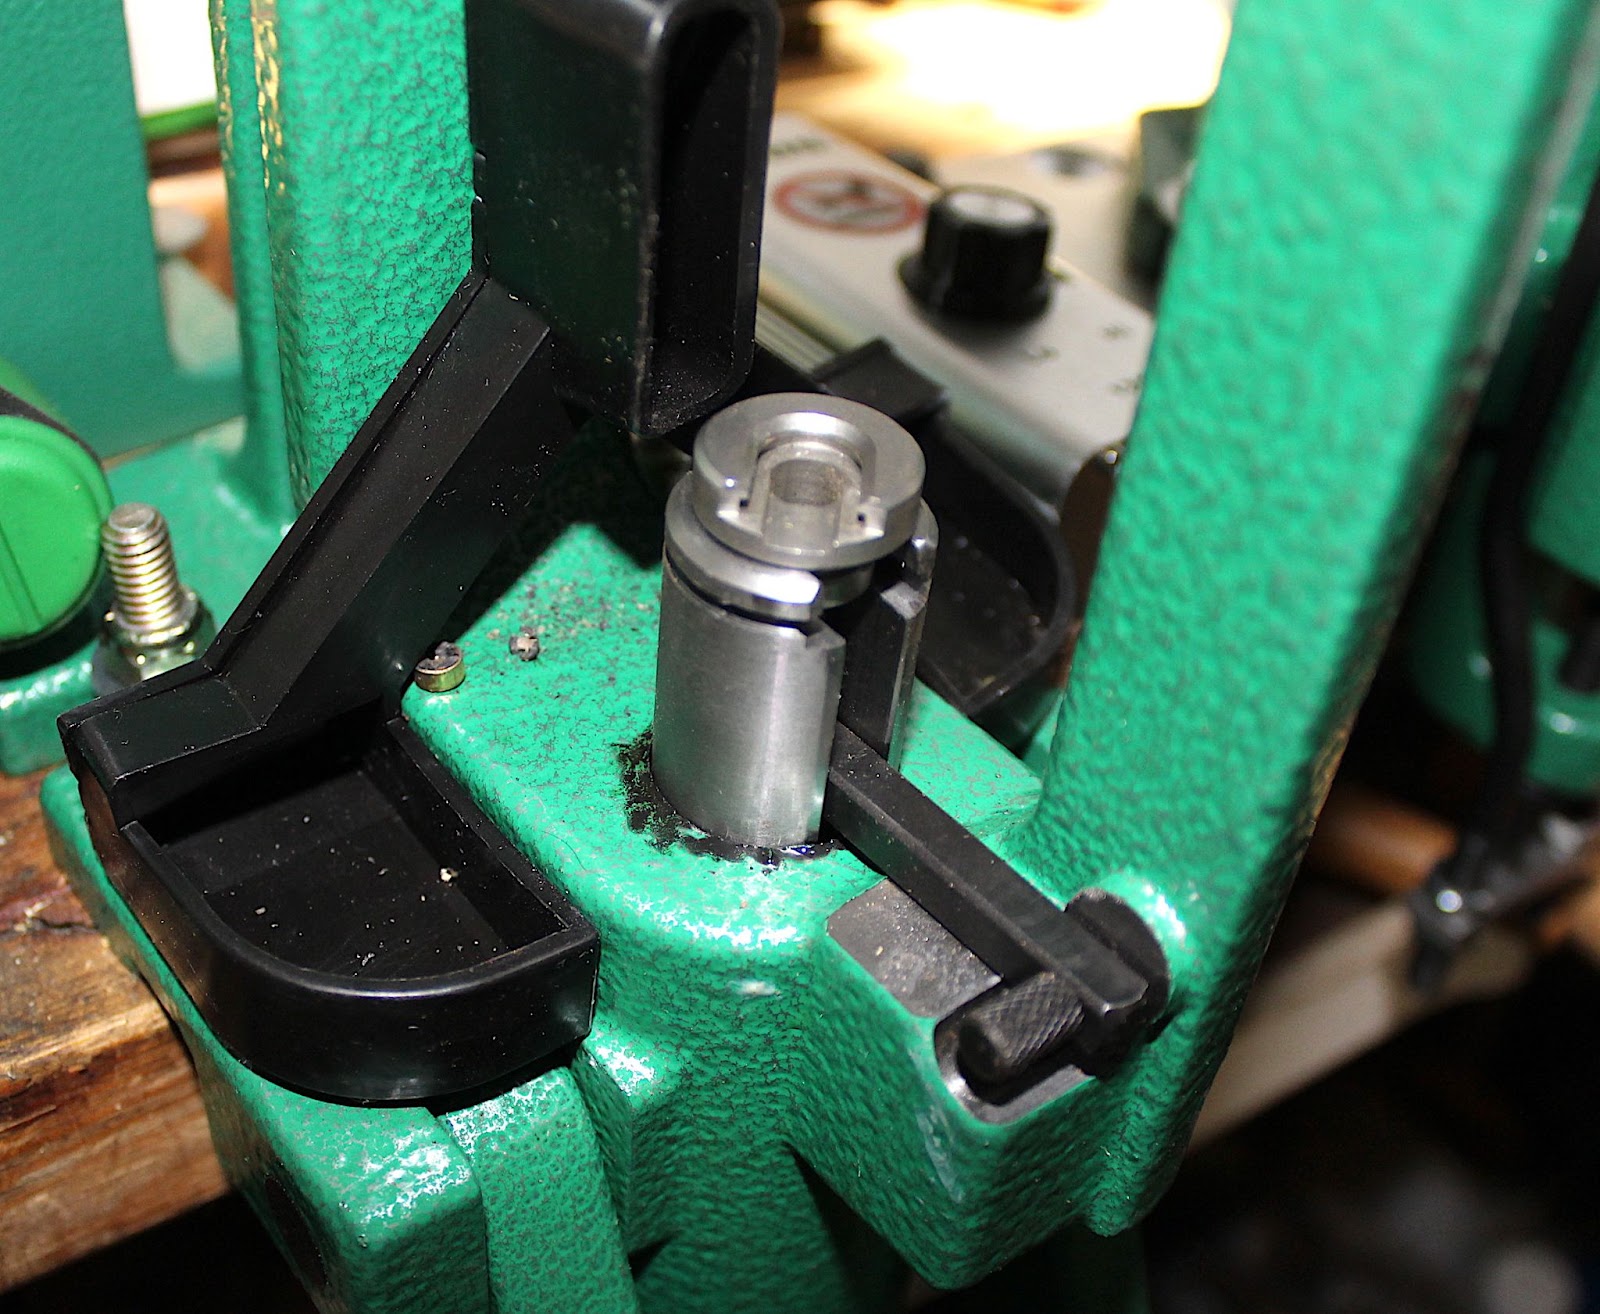
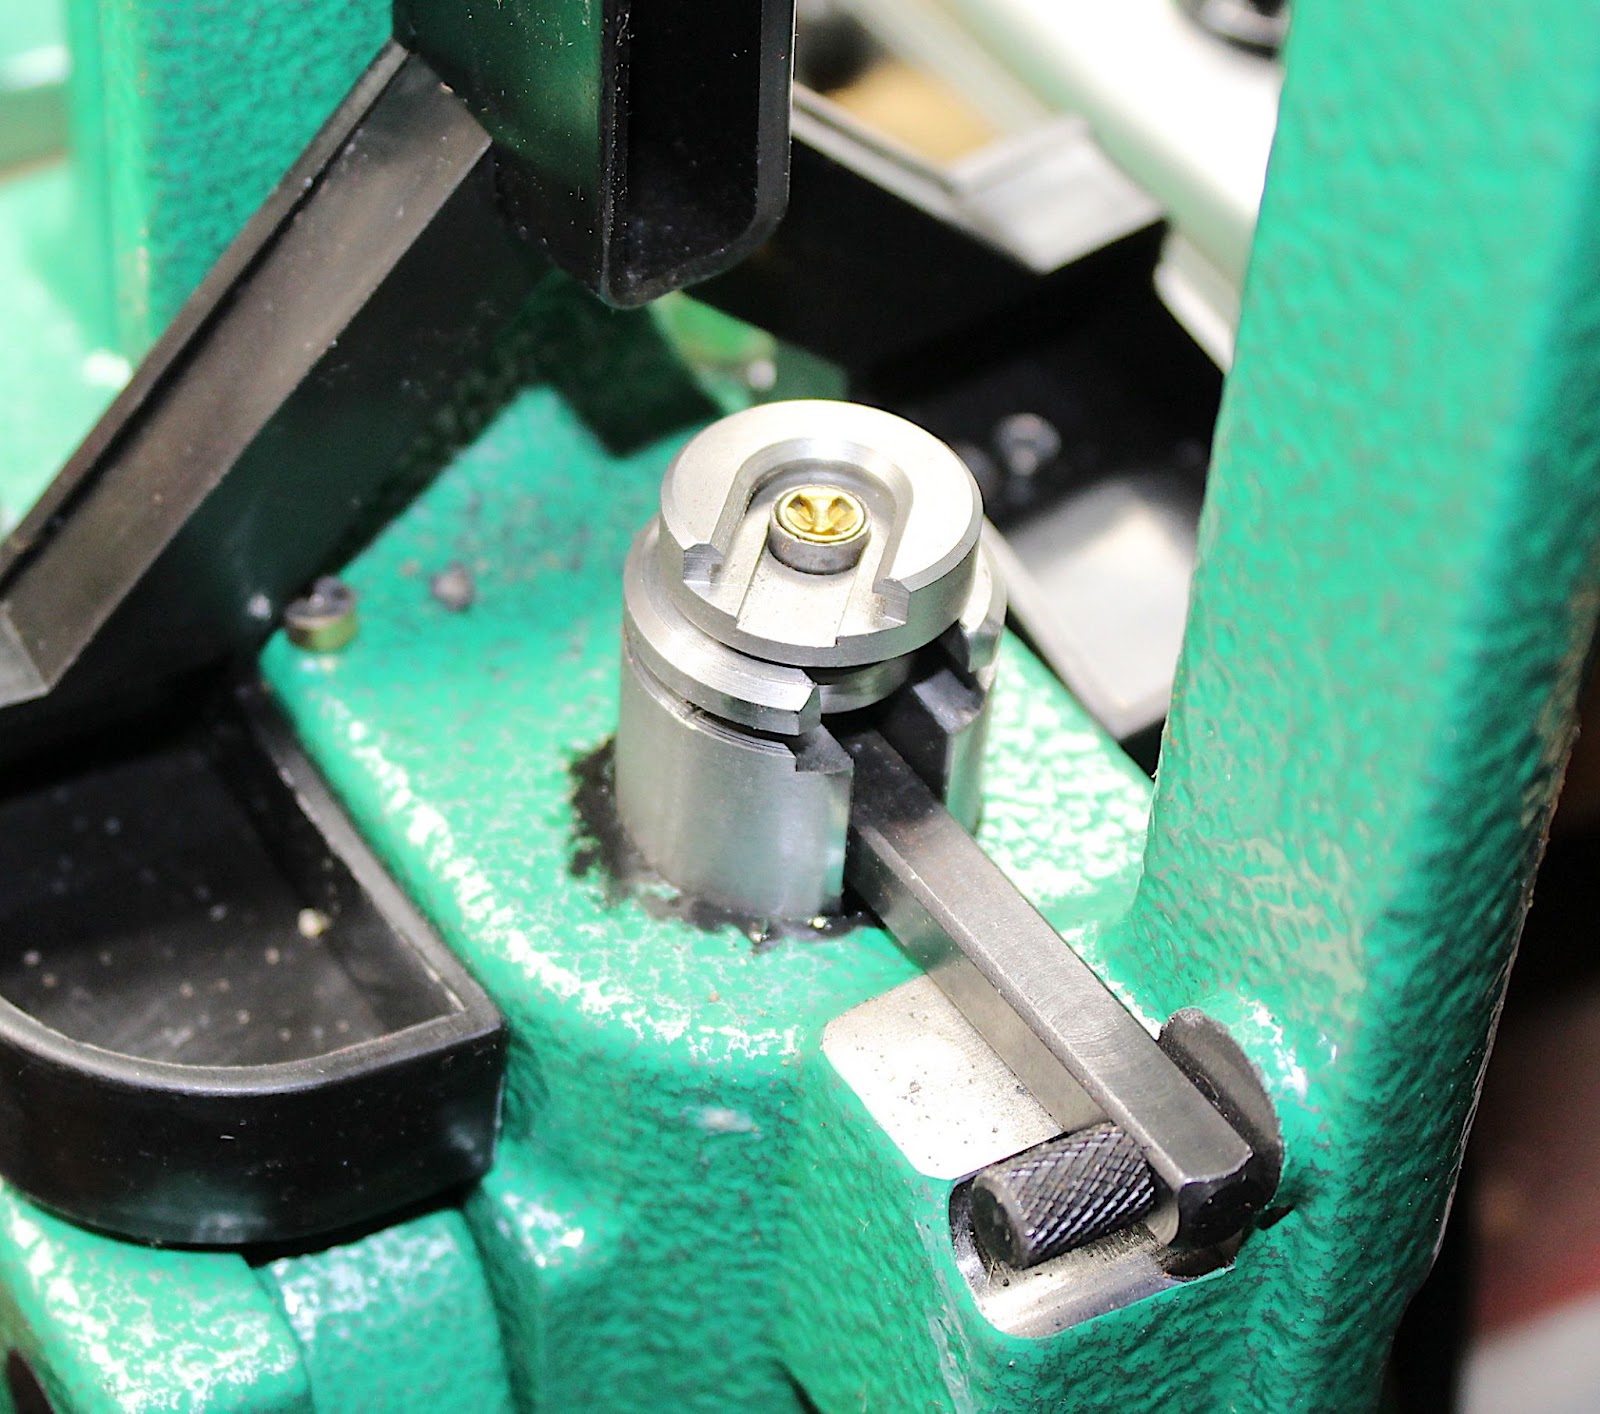
The press, showing the shell holder and priming arm.
The cast-iron press itself is a marvel of engineering. My old RCBS Jr. press did not use compound linkage… that alone really helps with stubborn or large cases. Your force is multiplied when resizing cases with compound linkage. You also get a spent primer catcher, although I’ve yet to see one of those that can prevent at least a few primers from bouncing off the floor. I guess we’ll see. You can set the handle to operate on either the left or right side, so left-handed users have a choice. There is an optional base plate ($43) that makes mounting any RCBS press easy. It will “stiffen” whatever surface you put it on, and has holes pre-drilled. If the surface you’re mounting the press on is not overly firm, you might want to consider adding the plate to the mix.
The Uniflow-III powder measure is just what you need to dispense powder precisely.
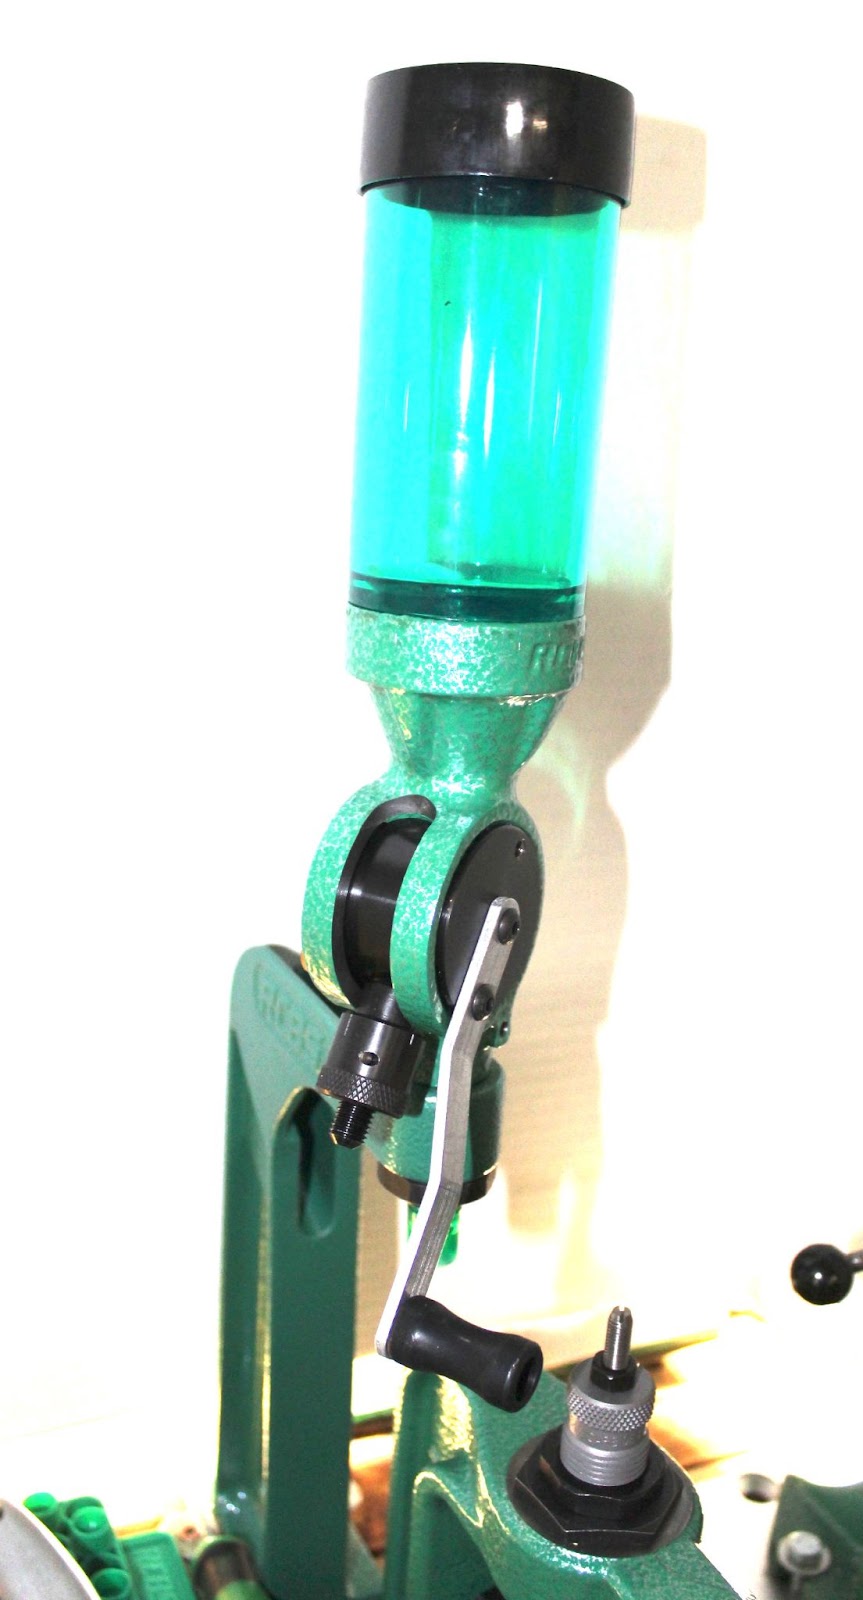
There are more expensive powder dispensers from RCBS, such as the UPM-3 Competition and the Match Master (I have both), but for beginning reloaders, this one works very well. (The Match Master functions as both a powder dispenser and a digital scale). You are after consistency… that’s the name of the powder dispensing game. Each charge needs to be the same as the one before it and the one after it, and all of these measures will do that.
In terms of scales, I am expecting to receive a Rangemaster 2000 soon. This is a battery/AC dual-power unit that can accompany you to the range. It can handle a 2000-grain load with a precision of +/- 0.01 grain. Portable scales are great for outside work but they are also useful on your bench.
The final piece of the precision pie that comes with the kit is the M500 Mechanical scale. You have to be able to accurately weigh powder charges, bullets, and cases, for that matter. This balance-beam scale will do just that. You need to place it at eye level to avoid bending over to read it.
I do have one recommendation here about powder scales. If you feel that you might have trouble using a balance beam scale and the above scales are too fine for you, RCBS offers a pocket digital scale that can weigh up to 1500 grains with +/- 0.1 grain accuracy. It fits in your pocket, is battery-powered, and costs only thirty-five bucks. Another reason to consider a digital scale is the time it saves. Balance beam scales work just fine – I have four of them, collected over the years – but the beam arms on them take a while to settle down, even with magnetic damping. Digitals display the weight right now. Check this page for details.
Whether you use the Match Master, the UPM-3 Competition, the Range Master 2000, the M500 Mechanical, or the Pocket Scale, you will have an accurate measure of your powder charge or bullet weight. Choose the one that works the way you do and fits your budget.
What about the other accessories listed above?
The deburring tool trues the case mouth after trimming, and keeps it burr-free and smooth. You have the “pointy part” that goes inside the case mouth to clean up after trimming, and the other end cleans up the outside of the mouth. It will handle cases from .17 to 60 caliber.
Speaking of case trimming… why would you need to do that? Case length is critical for accurate loads. All of your cases need to be the same length. This is especially true when reloading rifle cartridges, but I’ve also had to trim .44 Magnum cases as they stretch, as well. RCBS makes items to help you accomplish this task. The entry point is a manual trimmer that includes all the pilots you need for just about any caliber. (The pilots fit tightly in the case mouth and do the actual trimming. You need different sizes to fit different calibers.) Here is the $155, “Armstrong”-powered, manual trimmer. Here is the $400 electric, I-Feel-Lazy-Today version.
The brushes come in handy for applying just a touch of case lube to the inside of a bottleneck rifle case mouth to facilitate easy movement of the neck expanding plug upon resizing the case. You have both small and large brushes here.
Where are you supposed to put all those cases right after you fill them with powder, before you seat the bullets? Why, in the universal case loading block, of course! I own a couple of 50-round blocks that take up a lot of room. (I’ve even made many case blocks from wood and a drill press over the years.) I like the block that comes with this kit, as it fits better on a bench. Let’s face it… 25 rounds at a time is good. If you need more, there are those 50-space blocks out there, as I mentioned above, but I think I’ll enjoy this smaller one. Once you get 25 rounds loaded, stick them in a cartridge box.
This kit also includes some other very nice items. The case lube kit is useful for bottleneck rifle cases. Most pistol or other straight-wall die sets utilize a carbide resizer ring, eliminating the need for lubrication. The brushes mentioned above will allow total lubrication of rifle cases. They will allow you to brush a small amount of case lube in the case mouth to ease resizing, as mentioned above. You need to do that, in addition to lubing the outside of the case. Two sizes of brushes are included, which should cover all bottleneck cases.
Another item included is the hand priming tool. Many loaders prime on the press – you can do that here – but others prefer to hand prime their cases. They do it in front of the TV or during other “downtime”. It’s your call, but since the kit includes a hand primer, you may want to try it. Another useful item is a powder funnel, used to ensure that all the powder from the powder scale tray is transferred into the case mouth. This is required for individually weighed rifle charges. You don’t want loose powder all over your bench, trust me.
The final two items that I was really stoked to see included in this kit are the hex key set and the Speer #15 reloading manual. A reloader (or shooter, for that matter) seems to always need hex keys, and these are high-quality steel keys, attached together in an easy-to-find holder. As for the manual, I own the #9 manual from the late ‘70s. Comparing it to this new #15 manual is almost funny, but not in a good way. They have come so far in manuals… not only do you have a ton of loading data, but you also have chapters on reloading-related areas and lots of information about individual calibers. This manual sells for $45 on its own, and I see why. It’s a great addition to your loading bench.
Summing Up
Reloading is a great hobby to get into. Not only can you save money on ammo, but you also have the ability to craft custom loads that you can’t buy over the counter. Another plus is the feeling you get when you walk up on the downed deer or other critter that you got with your handload. The sky’s the limit on what you can do once you’re properly set up.

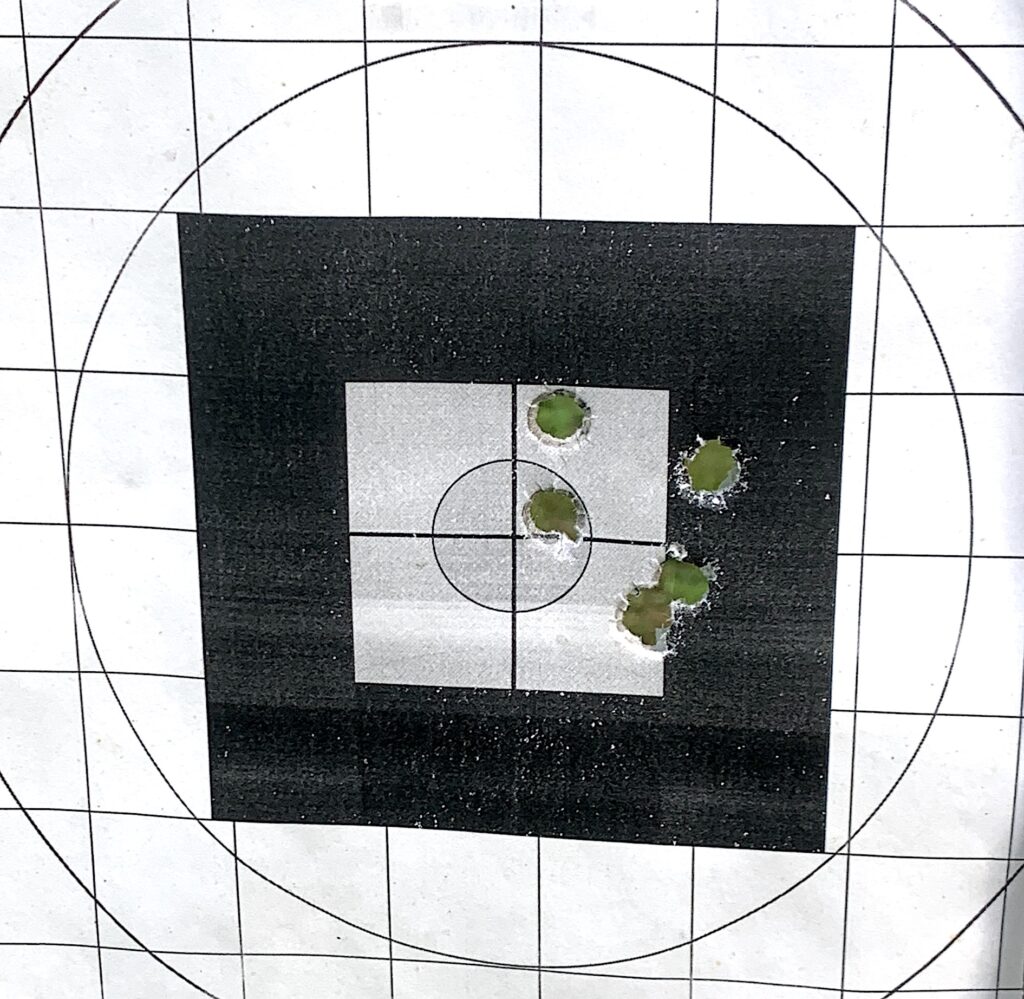
The end of the rainbow… ammo you can shoot with the knowledge that you made it yourself. 10mm load shown: Winchester new cases, Berry 180-grain JFP, 8.3 grains Long Shot, Winchester large pistol primers. I started with store-bought bullets in this caliber, although I am also using the bullet furnace and mould I received from RCBS.
The proof is in the pudding, they say. Well, here is the “pudding”… my first 25-yard target with the above load. Velocity is 1152 fps, energy 531 ft-lbs. The extreme spread was only 18.4, and the standard deviation, which should be low, is 7.4. I’ll take it.
Not bad, for a beginning! The Holosun red dot helped.
That’s where this kit comes in… it’s a great way to start reloading. Plus, it will help you in your reloading for many years. In my personal experience, I believe that personal experience is the best teacher. My personal experience with RCBS goes back, as I mentioned, decades. I have zero complaints. The equipment is well-built, it works, and it lasts for a long time. What else would you ask for in a reloading press kit? Who knows… This kit might help you start a hobby that allows you to shoot more for the same dollar amount, and also last you the rest of your life! What’s not to like?
Where To Buy
Read the full article here